Oh, tofu…Let me count the ways! Are you ready for a tofu recipe that will even impress your meat eating friends!? I love tofu, because it is so simple to make and easily absorbs the flavor of whatever you cook it with. I keep my tofu really simple and it goes great in bowls, fried rice, stir-fries and curries. I love a good fried tofu, but to keep this recipe on the healthier side, I bake this version. I have been making this tofu for years and finally decided to share the recipe.  Get ready to enjoy one of the best tofu bites of your life…

Ingredients

Directions

  1. Open your tofu, drain it, wrap it in paper towel and place a weighted item on top of it. Let it sit for 30-minutes to drain out any access water.
  2. Cut your tofu into cubes and place it in a Tupperware container.
  3. Add one tablespoon of toasted sesame oil and three tablespoons of Bragg Liquid Aminos to the Tupperware container.  Put the lid on it, shake it up and let it hang out in the fridge for an hour or overnight.  The longer the tofu hangs out in this mixture the better the flavor will be.
  4. Pre-heat your oven to 375 degrees.
  5. After you have marinated your tofu, line a baking sheet with parchment paper and dump your marinated tofu onto the parchment paper. Spread it out so that the tofu is not touching.
  6. Take your pepper grinder and grind pepper onto the top of the tofu, make sure to hit all of the pieces. More pepper is better in this case, so really go to town.
  7. Sprinkle your tofu with Tony Chachere’s Seasoning.
  8. Place your seasoned tofu in the over at 375 for 20-minutes. At the 20-minute mark, remove the tofu from the oven and flip it, making sure to keep the tofu separated as best as you can.
  9. Place your tofu back in the oven for 20 more minutes.
  10. At the end of those 20-minutes, remove the tofu from the oven and put into your favorite dish and enjoy!  You can also let it cool and store it in your fridge for up to 5 days.  Don’t worry though it won’t last that long!Happy Cooking!

Guys…it’s hot!  Like in the 80s, which is hot for San Diego, because not many places have AC. You will find most of us cooling off at the beach, sipping on frosty beverages, while snacking on chilled deli sandwiches. Well, not this San Diegan!  I have been doing a decent amount of traveling lately, and whenever I return home I have been craving giant bowls of vegetables. So instead of twinkling my toes in the sand at the beach, you will find me sweating over my stove whipping up this veggie packed green curry.  I know…it makes no sense, and I am not even going to try to make sense of it. This recipe freezes really well, so you can always make it now, freeze it and enjoy it later.

Ingredients

For the Brown Rice:
For the Thai Green Curry:
  • 2 Tsp Coconut Oil
  • 3 Cloves Garlic, minced
  • 1/2 Large White Onion, diced
  • 2 Stalks Lemongrass, tender white inner bulb only, minced
  • 1 Cup Carrots, chopped
  • 1 Cup Broccoli, chopped
  • 1 TBS Fresh Ginger, minced
  • 3 TBS Fresh Basil, finely diced
  • 2 TBS Green Curry Paste
  • 1/2 Tsp Turmeric
  • 1/4 Tsp Black Pepper
  • 1 (15 oz) Can Lite Coconut Milk
  • 1/2 Cup Vegetable Broth
  • 1 (15 oz) Can Chickpeas, rinsed and drained
  • 1 TBS Gluten Free Soy Sauce
  • 1 lime, juiced
  • 1/4 Tsp Salt
  • 1 Red Bell Pepper, thinly sliced
  • 1 Cup Frozen Peas
  • 1 Block Tofu
  • To garnish: Cilantro & Red Pepper Flakes

Directions

  1. To make the rice: Add the coconut oil to the pot, heat it and then add the rice.Toast rice over medium heat for 5 minutes until fragrant. Next add the water to a pot; bring to a boil, then reduce heat to low, cover and simmer.
  2. To make the curry: Heat oil in a large pot over medium high heat. Once oil is hot, add in garlic, onion, lemongrass, carrots, broccoli fresh ginger, and diced basil. Stir fry for about 5 minutes until the onions begin to slightly brown. Next add in green curry paste and turmeric and stir for 30 seconds to release flavors.
  3. Add in coconut milk, vegetable broth, chickpeas, soy sauce, lime juice, salt and red bell pepper. Stir well to combine. Bring to a boil, then reduce heat to low and simmer uncovered for about 20 minutes, or until carrots are tender. Right before serving, stir in frozen peas and tofu. Taste and adjust seasonings as necessary.
  4. Serve over rice in a bowl and garnish with fresh cilantro and a dash of crushed red pepper if you like things spicy.

Notes: You can use whatever veggies you like.  If you like a thicker curry use a full fat coconut milk. My little tomato plant has been loaded with cute little tomatoes, so I added a couple to the top of this dish and it was amazing.

Enjoy and let me know how it turns out!

Fall, oh how I love thee…let me count the ways. Fall is one of my favorite times of the year.  I love the crunchy leaves under my feet, leaf peeping, boots over jeans, cozy sweaters, apple picking and pumpkin carving. I also love having the excuse to eat soup everyday. I love a good pot of soup, and there is nothing more comforting than filling your favorite pot with a ton of awesome ingredients, and making your house smell magical as all of the flavors start to come together. I could literally eat soup everyday. It’s great because, it tends to get better with time. It is the perfect thing to make and freeze, so that you can enjoy it now and then enjoy it in a few weeks when you are in a pinch and need something healthy.

For the next month I am living in Mendocino, CA working as a chef on the weekends and embracing all things fall and small town living during the week. After spending the last few years living in San Diego, I’ve forgotten what it is like to wake up in the morning to frost on your car and the intense craving for warm hearty foods. Since I am living by myself and have been doing a lot of cooking on the weekends, I developed this recipe to be a one pot wonder. You can quickly prep your ingredients, toss them into your favorite pot and within 30 minutes you will be enjoying a warm, healthy bowl of soul warming soup.  I hope you enjoy this recipe as much as I do, and that you have an amazing and festive fall.


Ingredients

  • 1 TBS Olive Oil
  • 1 Vidalia Onion, diced
  • 8 Cloves of Garlic, minced
  • 2 Roma tomatoes, diced
  • 1/2 Cup of Curly Parsley, chopped
  • 1/2 Cup of Cilantro, chopped
  • 1/2 Tsp Salt, more to taste
  • 2 Tsp Turmeric
  • 4 Cups of Vegetable Stock
  • 1.5 Cups Red Lentils
  • 1 Can Chickpeas, drained
  • 5 Cups of Fresh Spinach, I used two containers
  • 1 Lemon, juiced
  • Extra Cilantro for Garnish, Optional
  • Crushed Red Pepper, Optional

Directions:

  1. In a medium-sized pot, heat up the olive oil and sauté the onion and garlic until soft. Then add the tomatoes and keep sautéing until the tomatoes release all of their water.
  2. Add the chopped cilantro, parsley, salt and turmeric and sauté for three more minutes, until the herbs start to break down a bit and the turmeric starts to become fragrant.
  3. Add the stock and bring it to a boil.
  4. While the stock is coming up to a boil, rinse your red lentils three times, until the water is not cloudy and drain your chickpeas.
  5. Add the red lentils to the simmering pot and cook for 15-20 minutes, until the lentils start to break down and soften. They will turn from red to yellow.
  6. Once the lentils start to soften stir in the spinach and add the chickpeas.
  7. Cover the pot and turn down the heat to medium low, and allow to cook for 10 more minutes until the lentils have cooked completely and the spinach has wilted.
  8. Taste and add half the lemon juice. Taste again and add more lemon juice and/or salt if needed.
  9. Serve immediately and garnish with extra cilantro, some crushed red pepper and enjoy.

Happy Fall!


I am really excited to share a few quick recipes that I have been working on, and to share with you these awesome jars that I have been using. I was contacted by Infinity Jars about a month ago, and they asked if I would be interested in trying some of their ultraviolet jars.  I have been looking into upgrading the spice jars in my spice cabinet, so I thought why not give these jars a try. I jumped on their site and was surprised that they had more than just spice jars, so I decided to try one spice jar, one jar for oil and another jar for something pickled. I have been using these bottles for about a week, and I really like them. First off, they look super cool (winning), they don’t hold any odors no matter what you put in them, and they are easy to clean. I really like that the dark glass helps keep your herbs and oil happy a lot longer, than if you were to use a clear container. I can’t wait to share these jars and my recipes with you. Below you will find my review of each jar that I used, along with a quick simple way to use your new sexy kitchen jars.

Dried Rosemary 

50ml Screw Top Jar

Right now I have a huge rosemary plant outside of my house. I always use this rosemary fresh, because it is right outside of my door. However this new jar inspired me to try drying some of this rosemary. To make your own dried rosemary follow these quick and easy steps.

  1. Cut about five or six rosemary sprigs and wash them off.
  2. Lay them out on a paper towel overnight until they are completely dry.
  3. Once they are dry pre-heat the oven to 200 degrees.
  4. Lay the rosemary sprigs out on the baking sheet and bake for 45 minutes.
  5. After 45 minutes check to see if the rosemary is dry. It should easily fall off the stem when you touch it. If it still feels damp, place it back in the oven, and keep a close eye on it.
  6. Once your rosemary is dry, remove it from the stem and place it into a food processor.
  7. Pulse a few times until you get your desired consistency, careful not to turn it into rosemary fairy dust.
  8. Transfer your new spice into your favorite spice vessel and Voila, you now have your own dried rosemary!

I really like this jar for the rosemary. Dried rosemary is pretty strong, I took all of the rosemary out of the jar after a week, washed it, and the smell has not gotten stuck in this jar. I plan to keep this rosemary in this jar for the next month to see how fresh it stays, but so far it is just a fresh as it was a week ago!


Garlic Oil

250ml Square glass bottle with oil spout

I was excited to try the square bottle with the pour spout, because I have been wanting to make my own garlic oil for a while. I wanted to use this jar for an infused oil, because I know that the darker glass is great at keeping your oil fresher longer. I also just bought a bunch of nice olive oil from Ojai, that I was dying to use. Follow these easy steps to make you own garlic infused olive oil.

  1. Peel half of head of garlic.
  2. Rinse the garlic under cold water and let dry (preferably overnight).
  3. Once your garlic is dry, add one cup of olive oil to a sauce pan and bring it up to 200 degrees.You can use more oil just make sure that the container you are using can hold it.
  4. Add your clean and dry garlic to your oil and let it simmer in the oil for 5 minutes, careful not to burn.
  5. After five minutes, carefully strain your hot oil into a bowl that is resting in an ice bath to cool the oil
  6. Once your oil is cool, transfer it to your favorite oil vessel.
  7. You can keep this in your fridge for about a month.

The oil turned out great and after a week the jar is not holding any of the garlic smell, which I am really impressed with. I really like the pour spout on this jar, it has a little strainer on it that allows you to control how much oil pours out at a time. I hate it when I am using one of my fancy olive oils, and it comes dumping out onto whatever I am cooking.

Spicy Refrigerator Dill Pickles

500ml Glass Screw Top

I love anything pickled, but sometimes I don’t have the patience to wait for things to ferment. So I was excited to make my quick and easy refrigerator pickles in this new infinity jar. You can find my simple recipe here. The great thing about this recipe, that you can buy the ingredients in the morning and have a spicy pickle by lunch 🙂 . Now that is my type of pickle!

This jar was perfect for a quick batch of refrigerator dills.  It was big enough so I could enjoy them for a few days, but small enough that it forces me to make a fresh batch weekly.  I really like the secure lid and the fact that this jar does not hold odors makes me really excited to try some kimchi storage in this jar!

I hope you enjoy these quick and easy recipes and I hope that you check out Infinity Jars, if you are looking for an awesome upgrade to some of your well-loved kitchen containers. I just want to let you know that I received these jars from Infinity jars for free, but I definitely plan on buying more in the near future. If you would like some awesome jars of your own, click one the links above.

Enjoy!


veggie-fried-rice

Alright Folks, let’s talk about fried rice…

A bunch of rice tossed with fluffy scrambled eggs, some choice veggies and your favorite protein. I basically want to swim in this stuff.

It is a simple fact that fried rice is delicious, but unfortunately it is really not the best for you. I think that it might have something to do with the whole ‘fried’ aspect. I have good news for you though. You can now eat ALL of the fried rice without the guilt. The key is to cut the rice amount in half and replace it with a ton of seasonal veggies. Trust me this veggie packed version is awesome, and I promise you that you won’t miss the rice. Below is the recipe that I came up with, if you don’t like the veggies that I used, just swap them out for some that you do like.

Ingredients

  • 1/4 Cup Rice, uncooked
  • 1TBS Ghee or Preferred Oil
  • 3 Eggs, beaten
  • 6 Cups Veggies of Choice, (I used a combo of carrots, yellow onion, red pepper, broccoli, edamame and cabbage)
  • 1 TBS Ginger, minced
  • 4 Cloves Garlic, minced
  • 1 Cup Peas
  • 1 Cup Kale
  • 2 Cups Protein of Choice (I used one brick of tofu)
  • 1 Tsp. Granulated Garlic
  • 1/2 Tsp. Crushed Red Pepper (more or less depending on your heat tolerance.)
  • 3-4 TBS Tamari sauce or Braggs
  • 1 Cup Fresh Basil, chopped
  • Fresh Ground Pepper
  • 4 Green Onions, thinly sliced

Directions

  1. Cook your rice. Once it is cooked, fluff and put in the fridge or freezer to chill. You want your rice chilled though before you use it.
  2. Cook protein of choice and set aside.
  3. Whisk the eggs and pour them into a skillet. Quickly scramble the eggs. Set aside.
  4. Warm 1 tablespoon of ghee or preferred oil over medium-high heat. Add your veggies and sauté about 2 minutes to take a little of the crispness out.
  5. Add the ginger and garlic, and sauté until fragrant, about 30 seconds. Careful not to burn.
  6. Stir in the peas, kale, protein of choice, eggs, the rice, granulated garlic and crushed red pepper, 3-4 tablespoons of Tamari or Braggs into the pan, mixing the ingredients thoroughly.
  7. Lower the heat to medium-high and cook until the everything is heated through and well incorporated and you notice rice stating to brown a bit. About 5-7 minutes.
  8. Stir in the basil.
  9. Taste and add more Tamari sauce and fresh ground pepper if necessary.
  10. Top with green onions and serve immediately.

Notes:

I found that using cold rice works the best for this recipe. So make your rice the night before if you need extra time to chill it.

Also, if you want to up your protein game, feel free to swap out some of the rice for quinoa. You won’t miss the rice and the quinoa will add an extra protein kick.

I like to make this recipe when I have left over rice from a restaurant. For some odd reason this recipe always turns out the best when use rice that is left over from Indian food leftovers.

I also love to add hatch green chile sauce on the top of the rice for an added kick.

Enjoy!

veggie-fried-rice-4

chile-sauce-on-spoon

We are at the tail end of Hatch Green Chile season so I wanted to quickly share this recipe. First off, I want to start out by saying that I love all things spicy. I first fell in love with Hatch Green Chilies on our cross-country road trip from San Diego to NYC. We made a left at Albuquerque and landed in Santa Fe for the night. I ate my weight in hatch green chile sauce and I have had an obsession ever since. This year Derika and I moved back to San Diego from NYC and we made sure to stop in Las Cruces, New Mexico so that I could get my fill of Hatch Green Chiles.

For years I have been talking about ordering my own box of Hatch Green Chiles, so that I can have a supply of chile sauce in my freezer for whenever I get a craving. I don’t know why I have not yet ordered these chilies. I guess that this is procrastination at its best. However, I find that the universe has a funny way of sending you signs. This week while I was at the grocery store, they were actually selling Hatch Green Chiles from New Mexico!  I squealed a little and then swooped up a couple of bags of chiles. I immediately ran home to roast and make my first ever hatch green chile sauce.  What ended up happening is that we now have a freezer full of very spicy chile sauce, that will hopefully hold me over for the next few months or so. I might even make another run the the grocery store to see if they still have some chiles for sale…Yes, I do in fact have a problem!

Below is my super simple recipe for Hatch Green Chiles sauce, so that you can see what all of the fuss is about!

hatch-green-chili

Ingredients

  • 1TBS Canola Oil
  • 1.5 Cups Vandalia Onion, finely chopped
  • 5 Cloves Garlic
  • 4 TBS Gluten Free Flour
  • 1/2 Tsp. Ground Cumin
  • 3 Cups Vegetable Stock
  • 2.5 Cups Hatch Green Chiles, (Roasted, Peeled, Seeds Removed)
  • 1/2 Tsp. Dried Oregano
  • Salt and Pepper to Taste

Directions

To Roast the Peppers:

  1. Line a cookie sheet with tin foil and lay your peppers out on it.  chile-on-pan
  2. Turn your broiler on high and let your pepper broil for 7 minutes or so on each side. You want to really char them.charred-peppers
  3. Remove the peppers from the oven and place the hot charred peppers in a Ziploc bag for about 20 minutes so they can steam. This will help to remove the skin.
  4. After 20 minutes, put on gloves (trust me on this tip…my hands were on fire for the rest of the day) and remove the skins from all of the peppers.
  5. After the skin is removed, remove the stems, cut the pepper down the middle and remove all of the seeds. If you like a kick leave some seeds on the peppers. Just know that you have been warned!
  6. Toss the peppers into a food processor and pulse until you have a chunky processed consistency.

Preparing Your Sauce:

  1. To save you time, peel and then finely chop up the onion and garlic in a food processor.
  2. In a medium saucepan, add the oil and sauté the onion and garlic in the oil over medium-high heat, until tender (about 3 minutes).
  3. Stir in the flour, cumin, and cook over medium heat, stirring, for about two to three minutes.
  4. Stir in the vegetable broth, bring to a boil and simmer until it thickens.
  5. Stir in the chilies and oregano. Taste and season with salt and pepper
  6. At this point you may cool, and store in refrigerator.
  7. To serve, heat thoroughly and enjoy!

Notes: If you find that your sauce is to thick you can add some water. I did this the next day to thin out my sauce.

To save your sauce, fill an ice cube tray with the sauce and freeze it overnight. The next day remove the sauce from the ice cube trays, wrap each cube in plastic wrap and put the cubes in a zip lock bag and store in your freezer. This way you can use one cube or as many cubes as you like, to whatever you are cooking to add a little spice to your life.

Enjoy!

chile-sauce-from-overhead


Miami Beach

Miami is a city that has so much going on…it is a little sexy, a lot retro, a bit mysterious, and is a whole lotta hot. About a month ago, Derika and I were in Florida for a long weekend. She had to swing up to Miami for work, so I decided to tag along. I really couldn’t pass up an opportunity to spend a quick 24-hours in Miami. The last time I was in Miami was in 2005; we were on our way to Key West and popped into a cafe for lunch. At the time I did not do any research, and I could not even tell you where we ate lunch. This time around I knew that our time was limited, so I did my homework and tried to squeeze as much into the 24-hours as I possibly could. Below are my top suggestions if you want to eat your way through Miami in a limited amount of time.

Spend the Afternoon on Miami Beach

Heart Shaped rock1

Miami Beach surprised the heck out of me. I had no idea that the water was so crystal clear and aqua blue, and that the water temperature would be so warm. It almost felt like I was in the caribbean and I can’t wait to go back!

[youtube=https://youtu.be/oLn_jUCWnt0]

To maximize my comfort and to save my pasty white skin, I rented two chairs and an umbrella on the beach at our hotel for only $35 for the whole day! I had an amazing time strolling the beach, swimming in the warm water, and avoiding the afternoon storms while tucked under my umbrella. Just look at how cute this heart shaped rock was that I found!

Grab Dinner and Drinks at Cleo

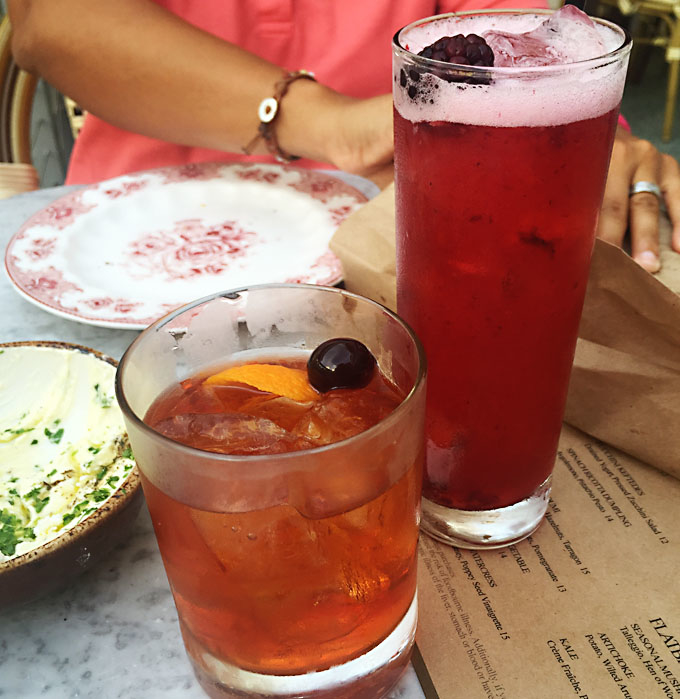
After spending the afternoon at the beach, Derika and I wanted to grab some dinner. With a little research, we found a super vegetarian friendly tapas restaurant just a short cab ride from our hotel. If mediterranean tapas is up your alley, I would totally recommend Cleo. They had awesome craft cocktails, one of the best warm and toasty pita breads that I have ever had, and their lebaneh with feta was to die for.

Sip on Some Tasty Beverages

Sweet Liberty Bar

Just look at all of those bottles! A bar that needs a step ladder to reach ALL of the alcohol is my kind of place. Stop into Sweet Liberty Drinks and Supply Company for an amazing cocktail from their huge bar. If you are feeling snacky, they also have food as well.

Tom on Collins

Before you head home for the night, pop into Tom Collins Caravan Bar and enjoy one of their amazing craft cocktails. They usually have live music, so saddle up to the bar and enjoy a night-cap or two!

Take a Food Tour Through Little Havana

El Pub Tostones

I am not a huge tour person, but when you are short on time sometimes it is a perfect choice. We took a Little Havana Culinary Tour through Miami Culinary Toursand I would highly recommend it. The tour was $59 dollars, lasted 3 hours and we had more food and beverages than we could eat. If you don’t have the time or the money to do the tour, here are the top places to visit in Little Havana.

Go get some tostones (smashed and fried plantains) at El Pub Restaurant and thank me later (tostones with garlic sauce are pictured above).

El Exquisito Coffee

Go to El Exquisito Restaurant and get a cup of cuban coffee. When you order your coffee, you will get a small cup of coffee with a bunch of tiny cups. The small cup of coffee comes with tiny cups, because it is actually a small cup of espresso with sugar in it that is meant to be shared. This stuff is delicious, but it is also like rocket fuel. You have been warned 🙂

El Exquisito Cuban Sandwich

While you are sippin’ on your espresso, you might as well order a cuban sandwich from El Esquisito as well, they are supposed to be one of the best in Little Havana. Thank you Derika for always being my meat taste tester.

Sugar Cane Juice

After your cuban sandwich, stroll down the strip for some fresh squeezed sugar cane juice from Los Pinaderos Fruteria. The juice was sweet and refreshing, and like nothing that I have ever tasted before.

Ball and Chain Mojito

While you are trying to escape the afternoon heat. Go check out the Ball and Chain bar, one of the oldest bars on the strip. It was just recently restored to all of its original glory and it is one of my favorite places on the tour. While you are there, you might as well try one of their world-famous mojitos, listen to some of the local music, dance with some locals,
[youtube=https://youtu.be/8WWpTTQosSo]
and don’t forget to go out back to take a peek at the pineapple stage!

Ball and Chain Pineapple Stage

If you need a break from all that eating and drinking, go to the Cuba Tobacco and Cigar Company. Learn how cigars are rolled and also get a chance to meet Senor Bello. Senor Bello is the poster child for this establishment. He is an adorable old man that is on all of the packaging. You will always find him sitting out in front of the store, smoking cigars and waving at the people passing by. It is basically like meeting a local celebrity…

[youtube=https://youtu.be/3JECz8muUec]

If you still have room, I have two dessert places to recommend.

Yisil Bakery guava pastry

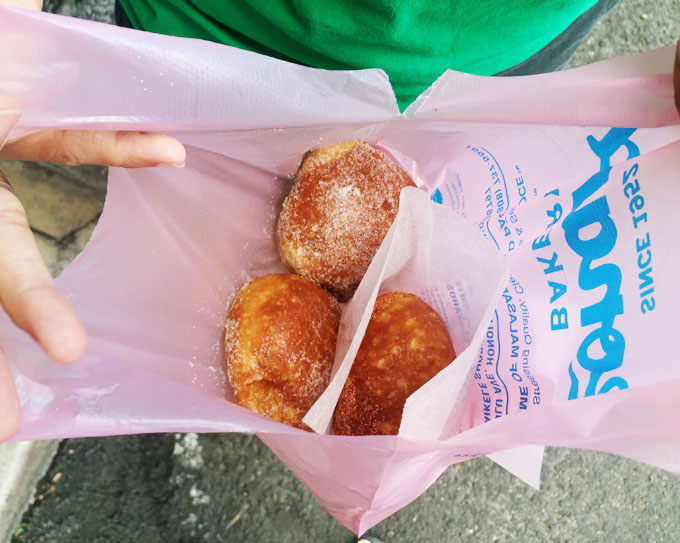
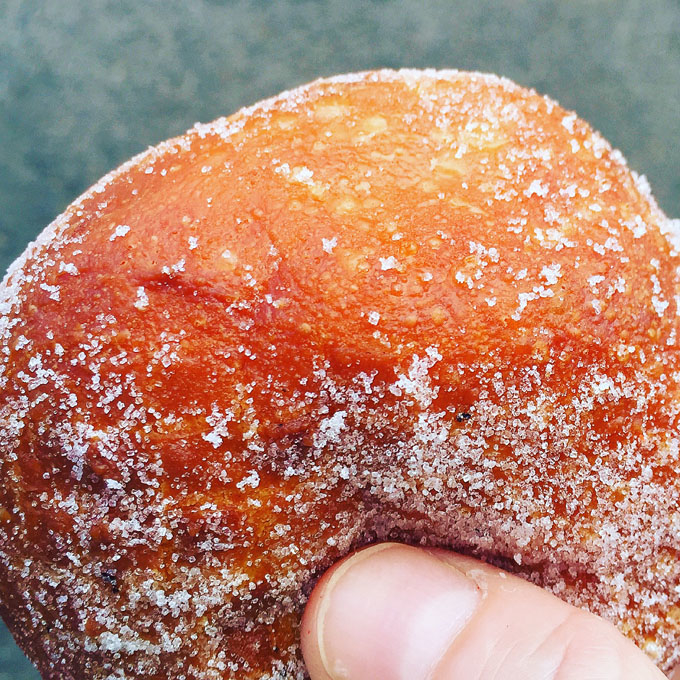
Go to Yisell Bakery and order the lightest and flakiest (is flakiest a word?) guava pastry that you have ever tasted. I know that you are probably bursting at the seams at this point, but just trust me. I don’t even really like pastries and I loved this magical guava one.

Azucar Ice Cream

Last but not least….you have to try the guava, cream cheese, and puff pastry ice cream from Azucar Ice Cream Company. This Cuban Ice cream company is probably one of the best ice cream places that I have ever been too, and this is the only place that you can get this unique flavor.

That pretty much wraps up all of the amazing things that we ate and did while we were in Miami. Take the food tour in Little Havana, but if you can’t I hope that you can at least get to one or two of the places that I listed above.

Sweet Liberty Drinks

Happy Travels!


Oahu Cover Photo

In January, Derika and I went to Oahu with a couple of friends to go to the Pro Bowl and to just get some R&R. We don’t often go back to the same place twice for vacation, but as far as I am concerned any day is a good do to go to Hawaii no matter what island. I love everything about Hawaii and would jump at a chance to go. We were also living in NYC at the time, so some sun and warm weather were exactly what the doctor ordered. When we went to Oahu the first time I did not do a ton of research, so I was excited to go back with a list.  Below are some of my favorite places that we visited while we were in Oahu.


Visit Waimanalo Beach

Waimanalo Beach

Waimanalo Beach is hands down my favorite beach on the island. Just look at the color of the water! It is so so stunning! What I really love about this beach is that it is pretty quiet, there is always available parking, and there are a couple of cute places near by to grab food; which also makes this place a great picnic spot. If you want to have a great picnic at this beach, visit one of the three places that I have listed below.

Eat at Ono Shrimp and Steak Shack

Ono Steaks and Shrimp Shack

Ono Steaks and Shrimp Shack is super close to Waimanalo Beach and a great place to check out some super fresh and local Hawaiian food. It is also a great place to grab a bite to eat if you are a vegetarian.

Eat at ‘Ai Love Nalo

If you want something super healthy go to ‘Ai Love Nalo for some farm fresh and amazing vegetarian food! This place is super adorable, so you could grab food and eat it there or take it to go for a great beach picnic.

Farm Fresh Sign

Their portions are huge and everything tasted so good, we got a couple of bowls and they were delicious.

Grab Some Middle Eastern Food at Shaloha

Stop off at Shaloha Pita on your way to Waimanalo Beach and get some of the most amazing middle eastern food for a perfect picnic on the beach. Get the Shaloha plate and you get to sample a little bit of everything. So good and more than enough for two people. There is also a little gas station right down the road if you need a frosty beverage to accompany your lunch 😉

Watch a Sunset at North Shore

beach

The North Shore had epic waves when we were there, so this is a great place to watch surfers or to go surfing. It is also a great place to catch an amazing sunset. After the sunset go and grab dinner at the north shore food trucks near Haleiwa.

Visit the Dole Plantation

Baby Pineapple 2

Did you know that pineapples grow out of the ground!? I had no idea this was the case before I went to the Dole Plantation. This is a very touristy stop, but go here to see all of the cute baby pineapples and then stop and get some Dole Whip.

Dole Whip

This my friends is the most amazing pineapple ice cream you will ever have.

Cool Off with Shave Ice

Shave Ice Sign

If you are on the East side of the island go check out the World Famous Shaka Shave Ice shop. I like to stop at any place that claims to be world-famous. I am also obsessed with shave ice and I have to say that this is one was amazing! The portions are HUGE!

Shave Ice 2

If you want some of the best shave ice of your life.  Check out Uncle Clay’s House of Pure Aloha. They make their own ice cream and all of the syrups are made with fresh Hawaiian fruit.

Sip on a Mai Tai and Watch a Sunset

Mai Tai Sign

My advice to you is to run to the Mai Tai Bar in the Royal Hawaiian for one of the best Mai Tais of you life.

I would recommend that you make a reservation for their patio, so that you can sip on a Mai Tai and also catch a great sunset.

Mai Tai Sunset

If you are on the North Shore, I would head over to the Turtle Bay Resort for a sunset. While you are there try one of their amazing Mai Tais at their pool bar. The bar is overlooking the ocean and if you are feeling hungry you can snag some great food with an amazing view.

As you can see…I drank a lot of Mai Tai’s while I was in Oahu.  If you find yourself in Waikiki, head on over to the Marriott Waikiki Beach Resort for a sunset and a great mai tai at the Moana Terrace that is right by the pool.  They also have really amazing fish tacos if you are feeling hungry.


Eat Like a Local at a Farmer’s Market

Market

If you are in Oahu on a Saturday or Tuesday, do yourself a favor and check out the KCC Farmer’s Market, it is the biggest one in Honolulu. I love a good farmer’s market, and if you want to get a unique taste of Oahu, this is the place to do it. We basically ate our way though the market and I do not regret it one bit. As a matter of fact, I am getting hungry just looking at these photos!

Eat ALL of the Malasadas

Leonards sign

I am not a huge donut fan, but I fell in love with malasadas. They kind of remind me of jelly filled donuts, but they are a bit smaller and a lot more tastier. To get some of the best malasadas on the island, you should check out Leonards. This claim usually means that the line can get pretty epic, but I promise you that it worth the wait.

Try a Loco Moco Bowl

Heavenly Sign

If you are wondering what the heck is a loco moco, then you should definitely try it. 😉 A basic loco moco is white rice, topped with a hamburger patty, a fried egg and brown gravy.I know this sounds kind of strange. It is almost impossible to find a vegetarian version. If you really want an amazingly healthy and delicious meal go have a meal at Heavenly restaurant. This is an adorable place that have a ton of great organic and local options, and I was super excited to try their vegetarian version of the loco moco with an ice-cold local beer.  It was so so goooood!

Heavenly Loco Moco Bowl

Visit some Breweries

Head over to Kakaako Street Art for some epic murals and a fun brewery walking tour.  Some of my top brewery recommendations are the Waikiki Brewery, Honolulu BeerWorks, The Aloha Beer Company and the Brewseum.

Hike the Koko Head Stairs

After eating all of that food, you are going to want to get outside and check out some of the amazing hikes that Oahu has to offer.  My favorite hike was the Koko Head Stairs.  It only took me about 30 minutes to climb, but it was seriously one of the more strenuous hikes that I have done. It is a little over 1400 stairs, which is actually an old railroad track that go straight up the side of a mountain. The views at the top are spectacular and you are going to want to hang out up there to catch your breath and to take it all in.

Hungry? Stop Here Before the Airport

We had a little extra time before we went to the airport so we decided to to grab one last Mai Tai and some lunch.  Head to the Kalapawai Market and Deli for a Mai Tai and a awesome sandwich.

That pretty much sums up my recommendations for Oahu and now I want to go back!


Happy Traveling!


Chili with text

A big bowl of chili is probably one of my favorite comfort foods. I have been known to make a big pot of chili at the beginning of the week, and eat off of it all week-long. I love that I can add avocado, scallions, cheese, cilantro, jalapenos, tortilla chips, etc. It is kind of like a choose your own adventure dish that just makes me so so happy. We were invited to a potluck last week, while San Diego was having a teeny chilly spell (pun intended), so chili just seemed like the perfect dish. Being a vegetarian at a potluck can be a bit interesting, because you never know if there is going to be something for you to eat there. To prevent this from happening, I always try to bring a dish that is vegetarian friendly and filling at the same time. This is the great thing about chili…it is super filling, really healthy and ALL the cool kids usually love it.

I already have a veggie chili recipe on my blog, but that one has soy crumbles in it. I never know what kind of dietary restrictions I am going to run into at a potluck, so just to be safe I threw in a bunch of beans and added quinoa into this new and improved chili. This way my chili packed a protein punch and was soy and gluten-free. Check out the recipe below for the perfect potluck dish.

Ingredients

*Note* – Feel free to used whatever veggies you have on hand, I just used what I had in the fridge.

  • 1 Cup Quinoa, cooked
  • 2 28 oz Cans Organic Crushed Tomatoes, pureed
  • 2 Cups, Low Sodium Veggie Broth (Make your own)
  • 6 Cloves Garlic, Minced
  • 1 Sweet Onion, diced
  • 1 Zucchini, diced
  • 1 Yellow Pepper, seeded and diced
  • 3 Carrots, peeled and diced
  • 1 Tsp. Ghee or cooking oil of your choice
  • 1 Can Pinto Beans, drained and rinsed
  • 1 Can Kidney Beans, drained and rinsed
  • 1 Can Black Beans, drained and rinsed
  • 1TBS Granulated Garlic
  • 1-2 Tsp. Ground Cumin
  • 1 Tsp. Chili Powder
  • 1/2 Tsp. Crushed Red Pepper
  • 2 Tsp Salt, more to taste
  • 1 Tsp Black Pepper, more to taste
  • Sriracha, (optional)

Toppings

  • 1 Jalapeno, cut into rings (optional)
  • 1 Cup Cilantro, leaves only (optional)
  • 3 Green Onions, cut on a diagonal (optional)
  • Tortilla Chips, (optional)
  • Shredded Cheese of your choice (optional)
  • Sour Cream, (optional)

Directions

  1. Cook your quinoa. Set aside.
  2. Heat the ghee or cooking oil in a soup pot and add all of your veggies, except for your garlic. Saute for 5 minutes just to take the edge off.Saute Veggies
  3. While your veggies are sauteing puree your crushed tomatoes in a blender or food processor. If you like a chunkier chili, you can leave your crushed tomatoes as is.
  4. After your veggies are done sautéing add the granulated garlic, ground cumin, chili powder, crushed red pepper, salt and pepper. Stir for about a minute to release the aroma of the spices.
  5. Once you can really smell the cumin, add the minced garlic, the two cans of crushed tomatoes and the vegetable broth. Stir to combine and bring to a boil.
  6. Turn the heat down and reduce your chili to a simmer, cover and let everything simmer for 20 minutes.
  7. After 20 minutes, add your beans, and 1 cup of cooked quinoa. Add BeansAdd Quinoa
  8. Taste and adjust seasoning as needed, and simmer for 10 more minutes. Feel free to add more veggie broth or water if it is too thick, or add more cooked quinoa if you want it a bit thicker. Also feel free to add some Sriracha hot sauce if you need more of a kick. I like to serve hot sauce with my chili so that people can make it as hot as they want.
  9. Try to make your chili the day before you plan on eating it. This way all of the ingredients have a chance to hang out with one another and it just makes it taste better. If you find that it has become really thick overnight, just add some water to thin it out and season with additional salt and pepper if needed.
  10. When your chili is finished. Toss it into a bowl and top it with any or ALL of the toppings that I have listed above. If you want to score brownie points with your friends, bring all of the toppings that I have listed above and create a chili bar for them to enjoy!  This my friends is how you win a potluck! 😉Chili2

Enjoy!


Asian Spaghetti Squash Bowls

I am currently crushing hard on anything that I can put into a bowl. I just love piling a ton of healthy ingredients into a bowl to easily create a simple, quick and healthy meal. You can even mix and match the flavors, which is what I love about bowls so much. Today I put this spaghetti squash mixture over greens and tomorrow I might toss it into some lettuce wraps. The possibilities are endless! This recipe originally started out as a spaghetti squash chow mein recipe, which turned out just OK. However when I added it to a bowl it became amazing. Picture the inside of a veggie egg roll on top or a bowl of your favorite greens, topped with your favorite protein, hot sauce and a dash of scallions and you have my amazing Asian inspired spaghetti squash bowl. Let’s start cooking so you can start eating!

Ingredients

  • 1 Medium Spaghetti Squash
  • 1/4 cup Braggs Soy Sauce (or coconut aminos to make paleo)
  • 6 Cloves Garlic, minced
  • 1 TBS. Turbinado Sugar (or coconut sugar)
  • 2 Tsp. freshly grated ginger
  • 1/4 Tsp. white pepper
  • 1TBS Ghee or Coconut Oil
  • 1 Medium Onion, diced
  • 3 Stalks Celery, sliced diagonally
  • 12 oz Broccoli Slaw Mix ( I bought a bag from the store, but you can grate your own)
  • Sriracha or favorite hot sauce
  • 2-3 green onions, sliced diagonally, optional
  • 1-2 Sprigs Cilantro, optional
  • Chili Garlic Sauce, optional

Directions

  1. Follow my spaghetti squash recipe to cook your squash.
  2. In a small bowl, whisk together soy sauce, garlic, Turbinado sugar, ginger and white pepper; set aside.
  3. Heat oil in a large skillet or wok over medium high heat. Add onion and celery, and cook, stirring often, until tender, about 3-4 minutes. Stir in broccoli slaw until heated through, about 2-3 minutes.
  4. Stir in spaghetti squash, soy sauce mixture and protein for choice (I used this tofu) until well combined, about 2 minutes.
  5. Taste and add some Sriracha or your favorite hot sauce if you think it needs a little kick. I am a bit hot sauce obsessed.Spaghetti Squash
  6. Fill your favorite bowl with your favorite greens, I used a kale blend mix, top the greens with the spaghetti squash mixture, garnish with green onions, cilantro and chili garlic sauce if you are feeling sassy.

I don’t think that it can get any easier than that!

Enjoy!